The canvas element was originally developed by Apple for OSX as a way to encourage easy customization of dashboard widgets. It utilized Apple’s HTML rendering engine called webkit to create 2D graphics at around the same time as the WHATWG (Web Hypertext Application Technology Working Group) came together to create what would become HTML5. Apple, of course, played a central role in the creation of HTML5, and the technology was adopted by other the browser vendors.
What Is It?
Canvas is a drawable region that uses Javascript drawing functions to create dynamically generated graphics. This is what other drawing programs do. Illustrator draws vectors using postscript to create pictures, Canvas uses javascript. A difference is that the vectors are always rasterized at screen resolution in canvas, meaning that they are turned into a bitmap.
How To Use the Canvas Element
You first have to create the canvas element, and you do that in the body of the document:
<canvas  id="canvas" height="250" width="300">
	<p>Use a browser that supports the canvas element
</canvas>
The canvas element needs to be initialized in the Javascript, which appears between the <script type="application/javascript"> and </script> tags, and that is usually done in the head of the document:
The actual instructions are written right after the canvas element has been initialized. The following examples show the instructions that draw a square and a circle.
Square
You draw on the canvas by coding the exacting steps the computer requires to draw these shapes. There is only one shape it supports natively, and that is a square. All other shapes have to be drawn path by path. Luckily, there are drawing functions that make it possible to create complex shapes.
If we take a red square as an example, you first specify the fill style and then fill the rectangle based on the given coordinates. Click the draw button and you will see this red square appear in the canvas window. If you change the values, the square will change.
Javascript Code View
var canvas=document.getElementById('theCanvas');
var context=canvas.getContext('2d');

//code for the square
context.fillStyle = "rgb(255,0,0)";
context.fillRect(50, 50, 50, 50);
Paths
Paths require a few more steps. You have open and close a path using the following code: beginPath() , and closePath(), though the shape automatically closes when you stroke() or fill() the path. In that case, the closing of the path can be skipped. There are path methods that draw lines, arcs, bezier and quadratic curves.
The following circle has all of its steps annotated, so show exactly how many steps it takes to create a red circle with a white fill that has a shadow, the letter P and a stroke to create a no parking sign. Copy the code and replace the code for the square in the Javascript Code View, click Draw It if you haven’t already done so, and you can play with the code, add to it, subtract, to see how it works. If you get excited, I have included many more definitions below that you can use to draw simple shapes.
context.beginPath(); //Begin drawing path
context.strokeStyle="#f00"; // sets stroke color
context.fillStyle="#fff"; //sets fill color
context.arc(175,120,100,0,Math.PI*2, true); // draws circle
context.lineWidth=40; // sets width of stroke
context.shadowOffsetX="3" // adds shadow offset x
context.shadowOffsetY="3" // adds shadow offset y
context.shadowBlur="7" // adds shadow blur
context.shadowColor="#888"// sets shadow color
context.stroke(); // draws stroked circle

//remove shadow from inside of circle
context.shadowOffsetX="0" // removes offset x
context.shadowOffsetY="0" // removes offset y
context.shadowBlur="0" // removes blur
context.fill(); // draws fill
context.closePath; // closes path

context.beginPath();  // draws P
context.lineWidth=15; // width of line
context.strokeStyle="#000"; // color of stroke
context.fillStyle="#000"; // color of fill
context.font="9em sans-serif"; // size of font
context.strokeText("P",120,190); // text stroke
context.fillText("P",120,190); // text fill
context.closePath; //  but closes path

context.beginPath();   // draws Slash
context.strokeStyle="#f00"; // sets stroke color
context.moveTo(100,50); // begin vector
context.lineTo(240,210); // end vector
context.lineWidth=25; // width of line
context.stroke(); // draw stroke
context.closePath; // not necessary but closes path
Definitions:
You can copy these definitions and paste them into the editor to create a shape. Check out the example shapes to see what definitions are required.
Styles
set the fillStyle

context.fillStyle="color"

set the strokeStyle

context.strokeStyle="color"

line widths

context.lineWidth=number

line join styles

context.lineJoin="style" (bevel, round, miter)

line end styles

context.lineCap="style" (butt, round, square)
Rectangles

draw a rectangle

context.strokeRect(left, top, width, height)

fill a rectangle

context.fillRect(left, top, width, height)

erase a rectangle

context.clearRect(left, top, width, height)
paths

begin a path

context.beginPath

complete a path

context.closePath

move the pen to a location

context.moveTo(horizontal, vertical)

draw a straight line from current pen location to a new location

context.lineTo(horizontal, vertical)

stroke the current path

context.Stroke()

fill the current path

context.fill()
Text

set the font

context.font="bold italic size font-family"

set the alignment

context.textAlign="left right center"

fill some text

context.fillText("string to fill", top, left)

stroke some text

context.strokeText("string to stroke", top, left)
Shadows

shadow color

context.shadowColor="color"

shadow horizontal offset

context.shadowOffsetX=number

shadow vertical offset

context.shadowOffsetY=number

shadow blur

context.shadowBlur=number

taken from Westciv
Simple Shapes
More code examples to paste into the Javascript Code View.
Smily Face
context.beginPath();
context.arc(75,75,50,0,Math.PI*2,true); // Outer circle
context.moveTo(110,75);
context.arc(75,75,35,0,Math.PI,false);  // Mouth (clockwise)
context.moveTo(65,65);
context.arc(60,65,5,0,Math.PI*2,true);  // Left eye
context.moveTo(95,65);
context.arc(90,65,5,0,Math.PI*2,true);  // Right eye
context.stroke();
Caution Sign
context.beginPath();   // Triangle
context.strokeStyle="#000";
context.fillStyle="#ff0";
context.moveTo(70,20);
context.lineTo(137,120);
context.lineTo(3,120);
context.lineTo(70,20);
context.lineWidth=3;
context.stroke();
context.fill();
context.closePath;

context.beginPath();   // !
context.fillStyle="#000";
context.font="5em sans-serif";
context.fillText("!", 58,108);
context.closePath;
Play Time
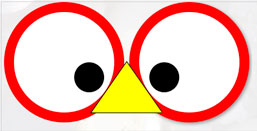
See if you can draw this figure using the shapes similar to the ones already drawn in the demo, or draw your own shapes. You can copy and paste the definitions, just make sure you initiate the object, give it properties, draw it and then create it, and if this seems laborious, be glad you are not a computer, who does nothing but this type of routines.
Better yet, watch someone else create a canvas based on processing, a sister visual programing language developed to teach visually oriented people programming, right before your eyes, using popcorn.
Turn Postscript Into Javascript
Drawing these primitive shapes by hand is really only for the purpose of understanding how canvas works. In its raw form it will never be a drawing tool for design students.
But that can change if someone were to write drawing software that could be translated to the canvas element. This is exactly what Mike Swanson has done. He created an Adobe Illustrator to HTML5 Canvas plugin. [Unfortunately, the plugin has not been updated, and it did not load the last time I tried it with Illustrator CC. Still, this is a good learning opportunity for you to understand how canvas works.]
This is an Illustrator plug-in that transforms Illustrator art into canvas art, allowing you use Illustrator as a front end to draw with, and the plugin will render it into Javascript code equivalent that can be rendered in the canvas element. Check out the Yellowstone Map as an example, and if you go to the website, you will see that the plugin is able to create motion graphics as well. We do not have the ability to install Illustrator plug-ins in the school’s computers, but please try this on your computer, as Illustrator is a very good front end to drawing directly on the canvas. If you follow his tutorial, you can even animate!
Illustrator
So here is an example of Illustrator art I created turned into Javascript. It takes only 5700 lines of code! To put that into perspective, the Illustrator file requires about the same number of lines using postscript to create the picture. Here is a text version of the Illustrator file, and the html source so you can see that there are an equal number of instructions.
Wrap Up
Advanced examples using the canvas element from the web:
- Information map to visualize information.
- Games, since Javascript controls the drawing code, why not have it be a game.
- A painting application.
Make Your Own Game
Step by step explanation of how to create your own game using javascript and canvas.